How to manage billing and plans in Orchly
View your plan, check usage against your limits, update payment details, and upgrade or downgrade.
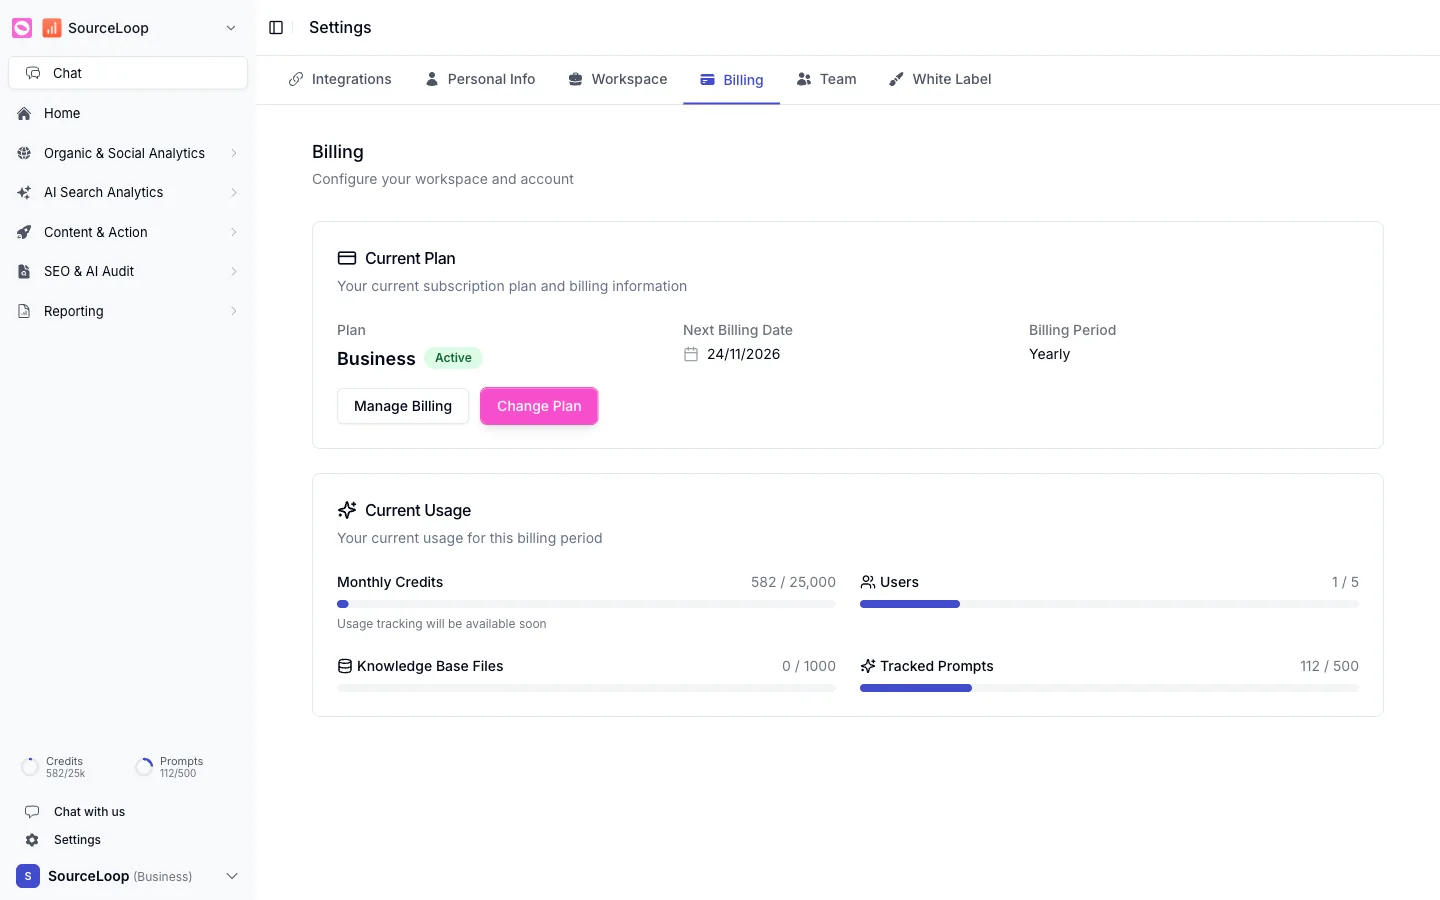
The Billing tab is where you see your plan, track how much of it you’re using, and make changes. It’s the page to check before you hit a limit, and the one to visit when it’s time to upgrade.
You’ll find it under Settings → Billing.
Your current plan
The Current Plan card shows your plan (for example, Business), whether it’s Active, your Next Billing Date, and your Billing Period (monthly or yearly). Two buttons:
- Manage Billing, to update payment details and view invoices.
- Change Plan, to upgrade or downgrade.
Your usage
The Current Usage card shows where you stand against your plan’s limits for the billing period, each with a progress bar:
- Monthly Credits, the credits agents and tools consume.
- Users, team seats used.
- Knowledge Base Files, documents indexed.
- Tracked Prompts, AI visibility prompts in use.
Before adding a batch of tracked prompts or inviting the whole team, glance at the usage bars here. It’s easier to upgrade deliberately than to bump into a limit mid-task. The same limits drive the prompts on other pages, like the keyword cap in the rank tracker.
If you’re on a monthly plan and committed to Orchly, switching to yearly with Change Plan usually lowers your effective cost. Check both options before you decide.