How to build your first agent in Orchly
Create an agent from scratch or a template, pick a model, and give it a job. A step-by-step guide to your first Orchly agent.
The fastest way to learn agents is to build one. This walks through creating an agent from scratch, picking a model, giving it a job, and getting it to run. Budget about ten minutes.
If you’re brand new to agents, read what are Orchly agents first for the lay of the land.
Start from a template or scratch
Open Content & Action → Agents and click New Agent. You have two good starting points:
- Duplicate a prebuilt agent. The quickest path. Copy the Article Writer or Link Enricher and adjust it. You inherit a working setup and just change what you need.
- Start from scratch. Full control, for a job the prebuilt agents don’t cover.
A builder panel opens on the right. Give the agent a clear name and a short description, then work down the fields.
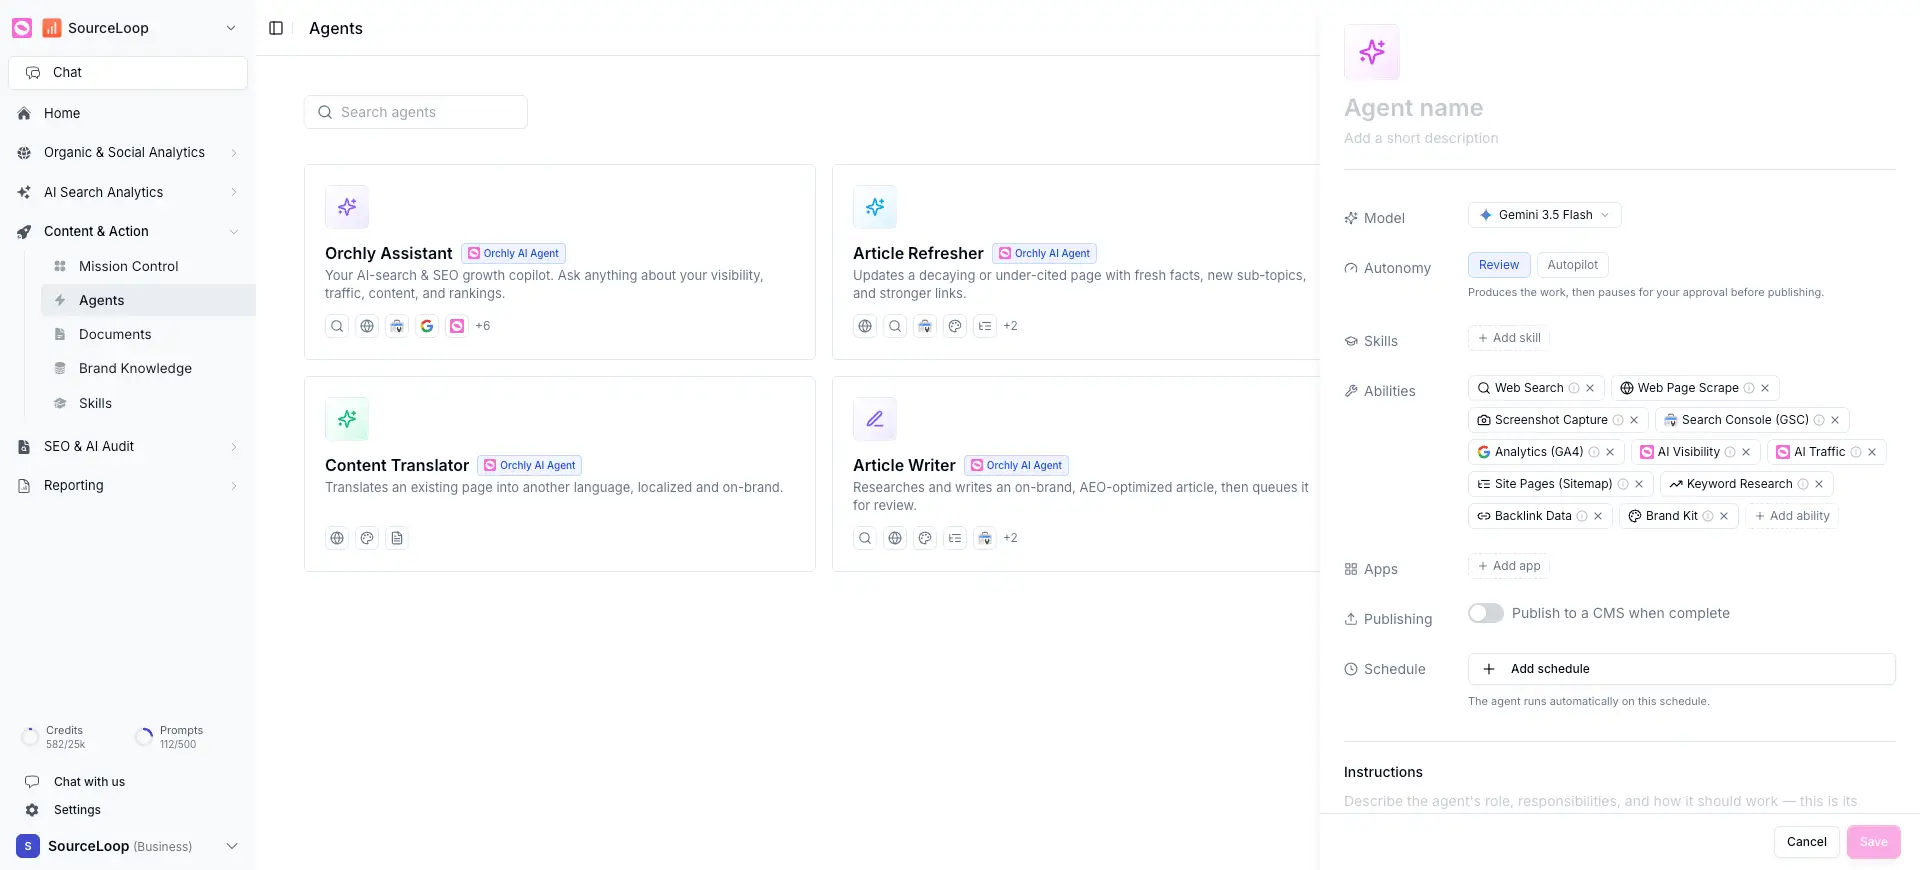
Pick a model
The model is the agent’s brain. Orchly gives you a range so you can match the model to the task:
- Claude (Sonnet 4.6, Sonnet 4.5, Haiku 4.5), strong all-rounders for writing and reasoning.
- GPT (GPT-5.5, GPT-5 mini, GPT-5.4 nano), fast options for lighter jobs.
- Gemini (3.5 Flash, 3.1 Flash Lite) and DeepSeek (V4 Flash, V4 Pro).
Use a bigger model like Claude Sonnet 4.6 for research and long-form writing, and a faster one like Haiku or a mini model for quick, repetitive tasks. You can always change the model later and re-run.
Write its instructions
The Instructions field is the agent’s brief. Tell it what to do in plain language, the way you’d brief a teammate: the goal, the inputs, and what “done” looks like.
A good brief for a writing agent names the target keyword, the audience, the angle, and the length. The agent uses your brand profile automatically, so you don’t need to re-explain your voice.
Add abilities, skills, and apps
An agent can only do what you give it:
- Abilities are its tools and data: Web Search, Web Page Scrape, Search Console (GSC), Analytics (GA4), AI Visibility, AI Traffic, Site Pages (Sitemap), Keyword Research, Backlink Data, Brand Kit, and more. See give agents abilities and tools.
- Skills are reusable playbooks it can follow. See what are skills.
- Apps connect external services for the task.
Set autonomy, publishing, and schedule
The last fields decide how it runs and where the work goes:
- Autonomy. Choose Review (the agent produces the work, then pauses for your approval) or Autopilot (it finishes and publishes on its own). See schedule and trigger agents.
- Publishing. Turn on Publish to a CMS when complete to send finished content straight to your CMS. See publish agent output.
- Schedule. Add a schedule so the agent runs automatically, or leave it off to run by hand.
Run your agent once by hand and read what it produces. Tweak the brief and abilities until the output is right, then put it on a schedule. It’s much easier to fix a brief than to clean up a week of automated mistakes.